Sunday, November 13, 2011

Short /U/ Pumpkins RTR and some visualizing!

Can I just say that I absolutely LOVE blogging!  Boy how boring would teaching be without great ideas from others.   I have to admit that although some things are my original ideas, most of the stuff I post about is things I have found on other blogs and just had to share. 

  This past week, we have been working on the short u sound in Reading.   Before we start each new sound for the week, I head over to Youtube and see if they have any videos from Hooked on Phonics for that sound.  Here is the one for short u and trust me your kiddos will love it.   Mine can't wait to hear it every day.


I also created a little read the room activity with short /u/ pumpkins.  I saw this on First Grader At Last and just had to do it!  Here are the pumpkins I made for my room and the recording sheet I made to go along with it.


Short /u/ RTR Recording Sheet


Our skill was visualizing for last week too!  I found so many great things on Pinterest for this skill.  The kids totally got the skill after these activities.  The first one we did was "The Green Giant" from Mrs. Williamson's Kinders.  They turned out so cute and so very different which was one thing I really emphasized to my kids.  Not everyone sees the same image.


The other visualizing activity we did was during our station time and sorry I don't have a picture of that but I do have the printable I created for it.  I saw this idea on Snippets By Sarah but I tweaked it a little to be more kid friendly for my kiddos.  I used the poem by Ding-A-Ling by Jill Egglton because it had words I knew my kids could sound out on their own.  Here is what we did...


Mental Image Printable


Enjoy Ladies!!!


Hocus...Pocus....Fairy Tale Fun!

We did our week long Fairy Tale unit the last week in October and I wanted to share a few things we did for fun.  Sorry there are no pics...I totally forgot my camera.

First, we read Rapunzel and did this great activity I found at Mrs. Tabb's First Grade Awesomeness .  The kids loved making the tower with the long hair.  We did make a little bit of change to our tower.  We wrote the things we would do in the tower and created one person we would let climb up our hair to hang out with.  They were cracking me up with who they would let climb up their hair.

Next, we read Cinderella and created her a new slipper that would definitely not fall off as she was leaving the castle.  I got this idea from Amy Lemons blog.  My kiddos came up with the same kind of ideas just like her kiddos.  Many of them created sticky shoes or fancy shoes with laces.  Every girl's dream!

Then, we read The Three Little Pigs and The True Story of the Three Little Pigs and discussed the differences between the two.  We also talked about the different points of view from which the stories were written and who we thought was actually telling the truth.  I told my kids we were going to make wanted posters for the pigs or wolf, whoever they thought was lying.  They did such a great job!

Wanted Poster


The last thing we did was discuss our favorite fairy tale of the week.  We read so many that it was very hard for them to choose just one but most of them liked Hansel and Gretel.  I think it is mainly because they had never heard it before.  I created this little sheet for them to review their favorite fairy tale and they did an excellent job.


Fairy Tale Review


Hope you all can use some of this stuff!  Sorry it is late for those of you who have already done it!


Remodeling Noun Town!

As I mentioned in my previous post, my class made a Noun Town for one of my observations this year.  Our town turned out great...especially once we created proper nouns for all of our common nouns. 


Since we were down with Nouns, I hated to trash our town so I hung on to it and I am so glad I did!  We moved on to verbs after nouns and we began a little remodel on our town.  First we watched this School House Rock video on Verbs...which they LOVED!


Next, we went to Noun Town and did a little remodeling.  We went through the town and talked about all of the verbs/actions we could do at each stop.  They thought this was just madness that we could do so much in our little town...it was super funny!  I have attached the verb pows we made in our town.


Verb POWS!
After we went through our town, I gave each child an action card (I cannot take credit for this idea...my co-worker did it for her observation).  Without talking, each child had to act out their card and find their partner in the room.  I don't think I have ever laugh so hard!  It was hilarious!
Action Cards!


After the action cards, I told the students we were going to create our very own action heroes (thanks to The Teacher Wife).  They were SUPER excited!  We made a circle map and discussed all of the actions a hero can do.  Then, we created our own heroes and let's just say they are MEGA cute!


Sorry I don't have the hero to download.  I had to free hand it from a picture I found online but check out The Teacher Wife...she has printables in her TPT store.
Here's a close up!


I know this seems like a lot to do in one lesson but it went super fast I promise.  Enjoy!


Noun Town!

This year, our school district adopted this new teacher evaluation system.  So, for my first observation I chose to do Noun Town.  Now, I have seen several different Noun Towns on Pinterest which is where I got my inspiration from.  I started our Noun Town by giving each student an index card and a plain sheet of white paper.  The index card had nouns on them that we would see around town.  I told the students to create the noun listed on their card.  They turned out so great! 


Here is our cute little town.

For my observation, we went through our town and made everything a proper noun.  We talked about how proper nouns are more specific and start with a capital letter.  I let each student take their common noun they made and tell me a proper noun to replace it.  They were so good at thinking of proper nouns.  It was a great visual to have!


Don't ya love the Goodwill...lol!

Check out the Chinese lanterns in our Chef Wang's...too cute!

I created some extra practice pages for morning work and they could totally find all the nouns.  Thanks to all of you bloggers out there for your great idea of Noun Town!

This one is both common and proper.

This one is common nouns only.


Day late dollar short....Subtraction and missing addends!


Boy oh boy... talk about some craziness!  I have been swamped with so much here lately, I have neglected my blog so BADLY.  Please forgive me!  Hope these next few posts and freebies make up for it.

So back like a month ago we taught some subtraction.  LOL!  Just like I did for addition, I made an anchor chart with key words used for subtraction as well as an independent anchor chart for my students to complete.  They are doing fantastic with subtracion! 


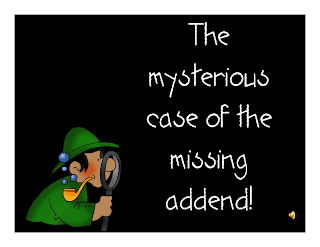
After subtraction we went into missing addends and when I searched high and low for stuff dealing with it, I couldn't find a thing.  So I began creating my own powerpoints for missing addends and my kiddos did very well grasping the concept.  The first one I made was about how to be a good detective to find the missing addends.  We talked about the many ways we could look for missing addends, such as we might just know the fact or we could use a number line/fact bracelet.  This was a great visual for my kids and helped them greatly.
 

Click on the here to download the powerpoint!
 

The second powerpoint I made was just some practice finding missing addends.  My kids LOVED trying to guess what was behind the magic curtain...lol!


Click on the here to find the powerpoint!


Hope you enjoy!!!


Sunday, September 11, 2011

Number sense and number words fun...

So at the beginning of the year we all want to see what exactly our new sweet babies know.  Well,  I have found two fun ways to check for number sense as well as number words.

I am not going to lie that I totally stole this idea from Mrs. Carroll over at The First Grade Parade.

Students use the giant number cards to clip that number of clothespins onto the card.  Well to give it an extra "umph"  I added number word cards to match the numbers.  So the students will have to match the number word to the number then clip the accurate number of clothespins onto the card.

Next,  while on pinterest, I saw the cutest activity for number words.  This is the original picture I found on pinterest and below it is my version of it for you to download.  All your students have to do is recognize the number word and glue the accurate number of Fruit Loops/suckers onto the octopus legs.  I added two things of seaweed into the corners so we could have the number words one and two.  So I had a parent cut out pipecleaners for them to use for the seaweed.

Click on the picture to check out her blog.

Please feel free to share if you have any other great ideas for number words or number sense.

Enjoy the freebie!

Addition Fun!

For the past couple of weeks we have been learning addition and thanks to pinterest and all of my fave blogs I have found several games and activities to use in my classroom.  Now I want to apologize in advance for not having any true pictures from my classroom for this post...I never seem to remember my camera.  However, I wanted to share some of these ideas with all of you.

First, we began with an introduction to addition.  We watched the Basic Addition Brain Pop and created an anchor chart for word clues used with addition.

Here are the words that were part of the vocabulary listed in our curriculum.


We made an anchor chart that looked exactly like this one from The Teacher Wife:


We use Thinking Maps at our school and I made this as a type of circle map for my kiddos to find the word clues for addition.  They will just cut and glue all the word clues for addition.


We also played several different addition games from various blogs.  Here are the ones we used.  Click on the pictures to see what other great things these blogs have to offer.


Hope you all enjoy!  Please feel free to comment with other great ideas for addition!

Map it out!

For the past two weeks we have been studying map skills.  So as I was on my newest addiction, pinterest, I found the coolest way to teach the differences between a neighborhood, city, state, country, and continent.

 This is the original picture from pinterest that I saw the idea from.
You can find this original posting here...Finally in First

I began the lesson discussing all of the different types of places you could find on a map.  Then I pulled up google earth and showed them our school on the map (we used it as our neighborhood circle).  We talked about how small that one little dot was compared to the whole Earth.  As the circles got bigger, we typed into google earth our city, state, country, continent.  It was so neat watching Google Earth getting bigger and bigger each time.  The kids really enjoyed it.  We drew something to represent each circle.  Then we discussed how we are just really a small part of the whole world. 

Although I do not have a picture of our circles (forgot my camera), they are fairly similar to the original picture.  I have added a link to the map circles I created in order to do this project.  Feel free to download them (just click the picture below), I just ask that you become a follower first.  I copied the circles on different colors of paper like above as well.


Rotation Stations

This year I decided to really buckle down on my stations and thanks to all of these wonderful blogs I have been printing and laminating station after station.  As a first year teacher last year, I did not understand just how difficult "creating" stations would be.  I felt challenged every day to come up with something more than just a "worksheet" activity.  Well since this is my second year this year, over the summer I got organized and got several things in order. 

First, I started by making a car magnet on Vistaprint.  The magnet sticks to my board and my students can see what our daily stations are.  This is what the magnet looks like:


Then each student has a blue station folder with their station "schedule" in a page protector.  The names of my stations stay the same but the activity is what changes.  My students keep all of their station work in their folder for the week then on Friday if they have finished all of their work, they can have fun friday where they get to do game like activities.  They have to turn in their folder into a crate that has hanging files in it with their number on the tag.  This allows me to make a quick check to see who is not finished.  My students LOVE it and so do I!  They are very organized and try extremely hard to finish all of their work by Friday.  If they do not get finished, they have to finish up on Friday.  Once they complete everything if they are behind, they can join in on Fun Friday.


Part of my daily stations is computers.  Last year, I was not organized at all with monitoring where my students went or what they did on the computer.  So this year, I created a daily schedule for them to follow.  The schedule was printed out and laminated then I used contact paper and made a make-shift mousepad.  My students can follow the schedule just by looking under the mouse.  I also use tizmos.com now instead of porta-portal.  It allows me to organize the sites by day and lets my kids see a quick picture of what they will do.  If you have never heard of it you need to check it out.  It is FABULOUS!


I also wanted to show you all how I organize all of these wonderful stations I have found on blogs.  I, of course, print them all off and laminate them.  I use manila folders (big and small) and put a short little description on the cover of it.

Then, I put a small sticker on the back of each piece of the station game to match the envelope.  That way if they were to ever get mixed up or misplaced I could quickly see which one does not belong.


   I also took all of the activities that were numbered and hole punched the corner so I could put them on a ring.  This helps them complete the activity in the same order as the recording sheet.

So how do you organize your stations?